Fixing an umbrella with 3D printing
I think this post should be probably titled “Quick-Fix Wednesday”.
Our youngest managed to cripple his umbrella this morning (and yet another this afternoon, but that one is unfixable). I think picture is worth thousand words:
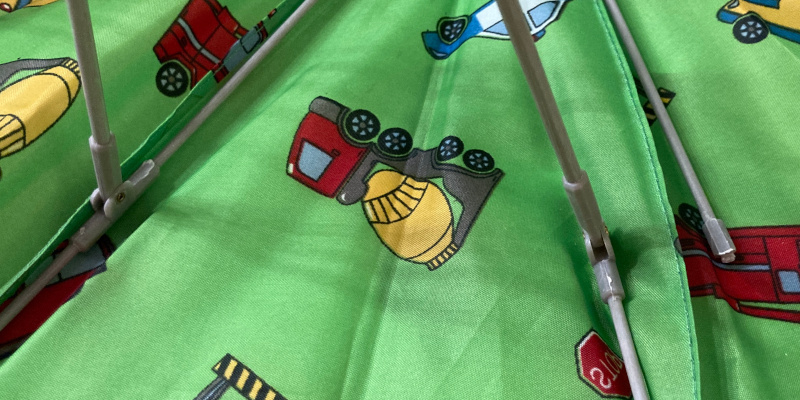
That T-joint is Fiberglass-reinforced Nylon… and yet somehow: “Daaaad! It just broke.”
Given the unpleasant weather, I had to move quickly. So it was caliper & Fusion 360 time.
Working with a severe time constraint, there was no messing around with
parametric modelling (save for shell parameter). So everything ended up
nicely hardcoded directly from caliper read-outs1… the way a noobie
– that doesn’t know any better (yet) – would do it. :)
Et voilà, a few tens of minutes of mucking around in Fusion, two iterations (about 25 min per print), and a couple of zip ties later, it seems to work2:
In the end, I even skipped bolting the crutch through the hole that I originally wanted to use for additional support. I mean, 4 zip ties should be enough for everybody.
As always, the design as well as the STL file are freely available under CC – BY NC SA license3.
-
I mean, truth be told… I did sketch it out for myself first – on my shiny new Remarkable 2 tablet – to figure out how I’m gonna model it. ↩
-
I fully realize it’d be cheaper in terms of raw cost of time and resources to get a new umbrella instead. But: a) where’s the fun in that? b) it’d get delivered in
O(days), as we don’t have Amazon Before in Switzerland. ↩ -
The non-commercial bit because I don’t want to get into hot water with Autodesk since my license is the free hobbyist one. ↩