Torch Bearer Spectrometer UI
Problem statement
Ever since starting the Reversing Philips Hue light driver journey, I’ve been missing a reasonable spectrometer.
As luck would have it, Hackaday ran a Software Hacks Unlock Cheap Spectrometer article a while back. So I ordered one.
But the original UI (while pretty) was… well, basic1:
 original UI from ZoidTechnology
You don’t have to squint hard to notice the lack of any spectrometer-related controls.
You could one-shot capture spectrum, but that was about it.
I set out to change that2.
Solution
Knowing nothing about the Colour Science package (or Matplotlib for that matter), I asked Mr. Claude about initial directions. After some coercing, I was able to get basic “custom button on the toolbar” functionality etc.
As I dove deeper, I dropped the AI help, and did it the old-fashioned way3.
In the end, I figured I wanted:
- Raw data export (for later analysis)
- Control over exposure mode
- Auto-refresh and one-shot mode
- Multiple graph types
- Keyboard control
- Quit button ;)
Well, would you look at that4:
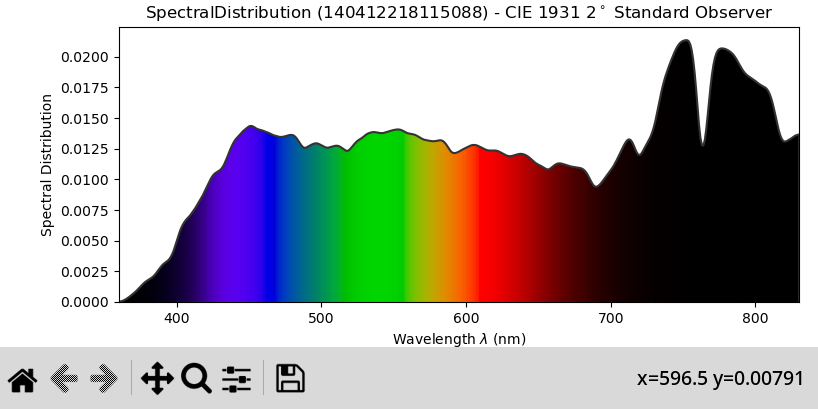
 pretty graph
 quick graph
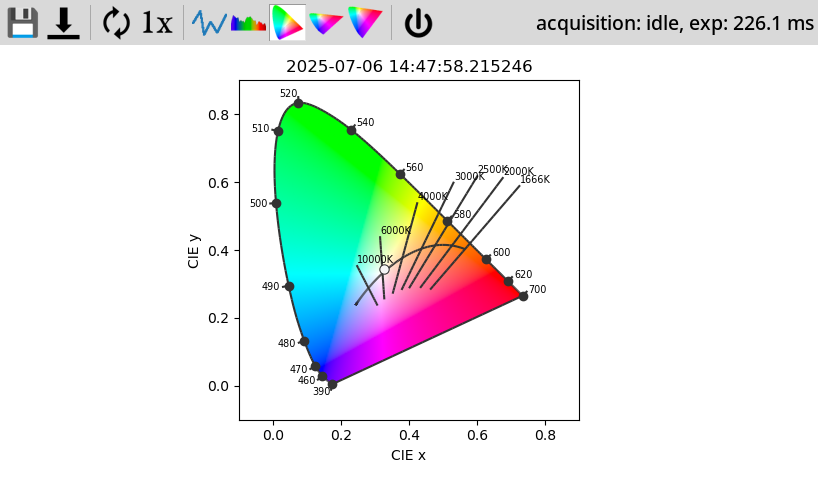 CIE1931 graph
I needed to add the quick graph mode, because the pretty graph takes about 0.5s to render on my machine, which is problematic for lower exposures with auto-refresh. :)
Closing words
The whole result is available as gh:wejn/tobes-ui, pull requests welcome.
I hope I’ve done a reasonable job with the README file there.
Anyway, I’m off to measure some spectral distributions. ;)
-
And I don’t do Android. Or windows. ↩
-
Originally as a pull-request, but then I gave up waiting. ↩
-
Lots of elbow grease. Not so glamorous, way more deterministic. ↩
-
Yes, when someone like me does icons, they’re screwy.
¯\_(ツ)_/¯↩