Putting an old digital clock (with an outdoor thermometer) on steroids
Introduction
We own a well aged digital clock with indoor + outdoor thermometer:
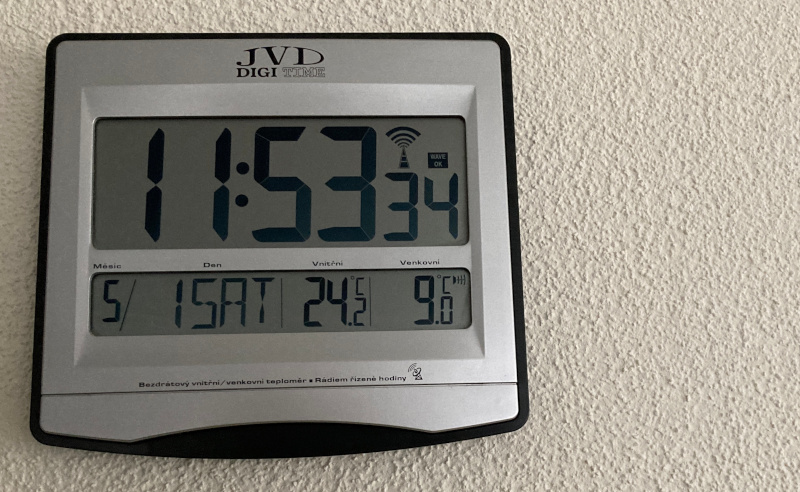
According to the label on the back, it is a rebranded “Electronics Tomorrow LTD.” model no. 7904.
It supports DCF77 time synchronization and has been working reliably for the past 20 years.
But recently I wasn’t so thrilled with the outdoor temperature sensor. It’s clunky, runs on 2 AAA batteries, and has the additional problem of being just on one side of the apartment. So you get skewed readings throughout the day, as the sun moves in the sky.
I decided to change that with a bunch of RuuviTags1.
Essentially I want to go from:

to:

Building my own transmitter
First step is to figure out what protocol does the outdoor temperature sensor speak to the clock. And pray it’s something simple. Given the clock is well past puberty now, it’s safe to assume it’s not going to be in the rocket science territory.
Time to bring out the big guns RTL-SDR.2
Using the highly scientific approach of “let’s go through all the ISM bands while I pull the batteries in and out of the outdoor sensor,” I scored on 433.9 MHz:
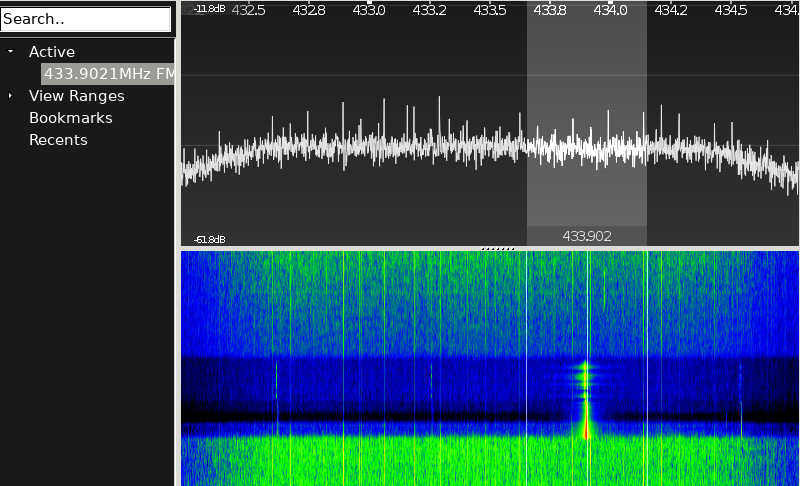 waterfall pic from CubicSDR
and a bit of searching later, I landed squarely on rtl_433 which is an awesome protocol decoder that understands many dialects frequently spoken on the ISM bands.
And I lucked out:
 success with rtl_433, it’s a philips_aj3650
Looks like the outdoor sensor uses the philips_aj3650 protocol.
Or a variant thereof:
#define PACKET_SIZE 32
bool pattern_template[PACKET_SIZE] = {
  0,0,0,1, // [0..3] static pattern
  0,0,1,0, // [4..7] channel (0=2, 2=1, 4=3)
  1,0,1,1,1,1,1,1,1,1, // [8..17] temperature_c = pattern - 500 / 10
  0,0,0,0,0,0,0, // [18..24] static pattern
  0, // [25] battery (0 = OK); WARN: our receiver takes bat low (1) as sticky
  0, // [26] static pattern
  0, // [27] unknown
  0,0,0,0 // [28..31] crc-4 of [0..27], poly 0x9, init 0x1
};
So it was only a matter of time to write up a proper transmitter.
I had a cheap 434 MHz transmitter lying around, so I wired it to an ESP32 board:
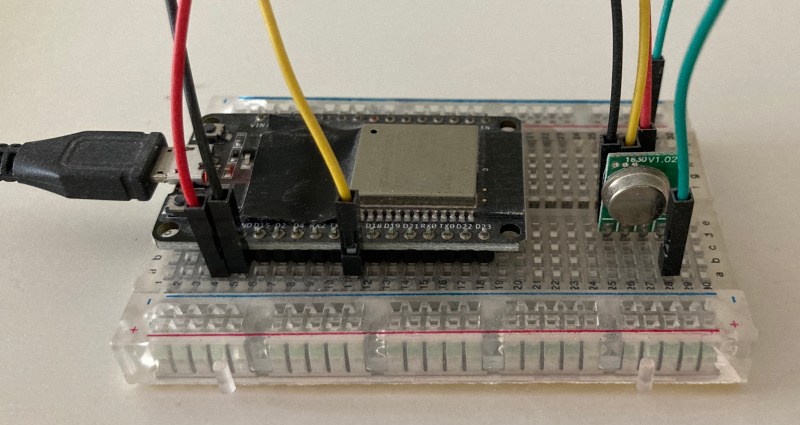 esp32 with cheap 434MHz transmitter; the green wire is a crude antenna
and wrote up the transmitter firmware using PlatformIO. See the jvd-digitime-434tx repo.
Essentially, I’m just bit-banging the protocol. Because it turns out, it’s a simple OOK (on-off keying) scheme.
// ...

static void transmit(bool state) {
  uint16_t l = state ? one_bit_length : zero_bit_length;

  gpio_set_level(TXPIN, 1);

  vTaskDelay(l / portTICK_PERIOD_MS);

  gpio_set_level(TXPIN, 0);

  vTaskDelay((bit_length - l) / portTICK_PERIOD_MS);
}

static void transmit_array(bool *ar, uint8_t size) {
  for (uint8_t i = 0; i < size; i++) {
    transmit(ar[i]);
  }
}

// ...

void tx434_task(void *pvParameters)
{
    bool packet[PACKET_SIZE];

    ESP_LOGI(TAG, "Configuring");
    gpio_pad_select_gpio(LEDPIN);
    gpio_set_direction(LEDPIN, GPIO_MODE_OUTPUT);
    gpio_pad_select_gpio(TXPIN);
    gpio_set_direction(TXPIN, GPIO_MODE_OUTPUT);
    ESP_LOGI(TAG, "Entering loop");
    while (1) {
        float temp_to_send = TEMP_ERRVAL;
        time_t now;
        if (temp_set) {
            time(&now);
            if (last_ts + TEMP_TIMEOUT >= now) {
                temp_to_send = current_temp;
            }
        }
        init_with_temp(packet, temp_to_send, false, 1);
        ESP_LOGI(TAG, "Sending: %.01f", temp_to_send);
        led_on();

        transmit_array(preamble_bits, 4);
        transmit_array(preamble_bits, 4);
        transmit_array(packet, PACKET_SIZE);
        gap();
        transmit_array(preamble_bits, 4);
        transmit_array(packet, PACKET_SIZE);
        gap();
        transmit_array(preamble_bits, 4);
        transmit_array(packet, PACKET_SIZE);

        led_off();
        ESP_LOGI(TAG, "Going to sleep");
        vTaskDelay(179 * 1000 / portTICK_PERIOD_MS);
    }
}
And how am I getting the temperature to send? HTTP. Naturally.
Final architecture
Having a proof of concept of the transmitter figured out, I turned to the final architecture.
I’m a big fan of HTTP. It’s easy to debug, ubiquitous, dead easy to target.
So the following makes sense (to me):
 final architecture
I could have gone with the esp32 doing everything. But an additional upside of having a more powerful webserver in the middle is that I can now check the temperature also on my phone3 and don’t have to re-flash the esp32 when I decide to tinker with the webserver some more4.
The BLE receiver (RuuviTag to HTTP server)
I did a quick search of what’s available, and turns out that Go has rather superb support for both Bluetooth LE and RuuviTag in particular.
So I’m not wasting a minute writing the pusher in a more programmer-friendly language.
Hence it was super easy, barely an inconvenience:
// ruuvipush.go
package main

import (
        "context"
        "fmt"
        "net/http"
        "net/url"
        "os"
        "strconv"

        "github.com/go-ble/ble"
        "github.com/go-ble/ble/examples/lib/dev"
        "github.com/peterhellberg/ruuvitag"
)

var apiurl = "nonsense"

func setup(ctx context.Context) context.Context {
        d, err := dev.DefaultDevice()
        if err != nil {
                panic(err)
        }
        ble.SetDefaultDevice(d)

        return ble.WithSigHandler(context.WithCancel(ctx))
}

func main() {
        if len(os.Args[1:]) >= 1 {
                apiurl = os.Args[1]
        } else {
                fmt.Printf("Usage: $0 <apiurl>\n")
                os.Exit(1)
        }

        ctx := setup(context.Background())

        ble.Scan(ctx, true, handler, filter)
}

func handler(a ble.Advertisement) {
        raw, err := ruuvitag.ParseRAWv1(a.ManufacturerData())
        if err == nil {
                // fmt.Printf("[%s] RSSI: %3d: %+v\n", a.Addr(), a.RSSI(), raw)
                resp, err := http.PostForm(apiurl, url.Values{
                        "id":          {a.Addr().String()},
                        "temperature": {strconv.FormatFloat(raw.Temperature, 'f', 6, 64)}})

                if err != nil {
                        fmt.Printf("Failed to post: %v\n", err)
                } else {
                        resp.Body.Close()
                }
        }
}

func filter(a ble.Advertisement) bool {
        return ruuvitag.IsRAWv1(a.ManufacturerData())
}
and the webserver itself is so boringly simple, that I’ll just point you to temperatures.rb rather than pasting it here.
I’m still undecided whether to display an average across all the Ruuvi tags, or the minimum. Time will tell what’s better.
In any case, throwing it up as daemontools services on an Alpine Linux is also laughably easy. If you want the details, it’s all in the ruuvi-tempserver repo.
Closing words
Well, there you have it. Putting a digital clock on steroids doesn’t have to be hard.
In fact, the only hard medium rare part was to code up the transmitter. The
rest was just easy copy & paste “programming”.
-
RuuviTag is a small temperature/humidity/pressure sensor that transmits data over BLE. With the CR2477 battery, its battery life is measured in ~years. ↩
-
RTL-SDR is a cheap DVB-T dongle sporting Realtek RTL2832U chip that some smart folks turned into a SDR receiver. If you can’t get it under $10, you aren’t trying hard enough. ↩
-
Yes, I am that lazy. ↩
-
Yes, OTA is a thing. It’s just not my thing. ↩